At some point you may need to share details between projects, or use details created by manufacturers. This video will show you how to copy Revit drafting details from one file into another.
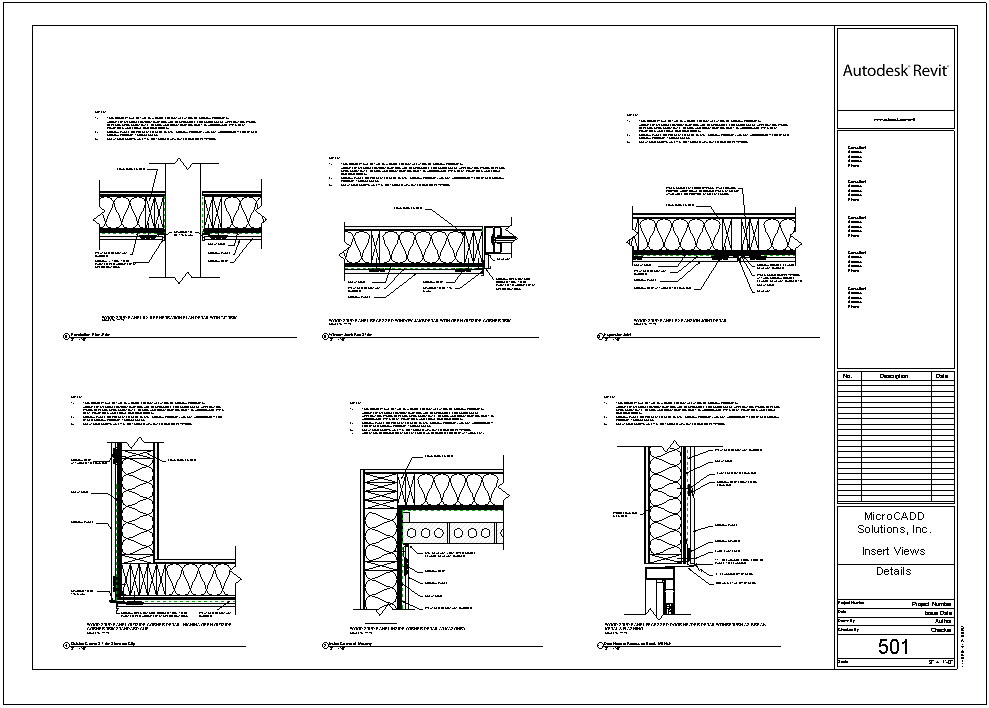
As you can see in the Project Browser, there is no category for Drafting Views, which is where our details are saved. This means there are currently no drafting views in the project. While we are showing this technique in Autodesk Revit 2015, it has been available for several years.
On the Insert tab in Revit (also true in AutoCAD and AutoCAD Architecture), one panel in the ribbon has been dedicated to Autodesk Seek. This is where you can search for manufacturers’ content if they decided to post on Seek. Users can also find content on individual manufacturer’s websites. In this example, we’ll go directly to one website to obtain their details. To insert Revit views, you will need access to the file with desired drafting views saved. As you can see, there is a Revit file with at least one detail that we can use. To save time I have already downloaded the file, opened and saved it in the current version of Revit.
In the Project Browser notice there are many details available in this file. We don’t need it open to insert the views, so I’ll close the file. In the project file where you want to add the detail views, go to the Insert tab, Insert from File and select Insert Views from File. As you can see by the tool tip, you can also bring in schedule formats and sheets from other files. Navigate to the folder where your details file is located, and select the file. Using the pull-down note that you can filter your options in the list. If the Preview selection box is checked, you can see thumbnails of each selected view. You may see a dialog box indicating there are duplicate types. Once the detail views have been added to the project, they are available to place on a sheet.